Windows 11’s notification system may be used by applications to send notifications to the user’s desktop. Apps may use it to send reminders to the user. A common scenario that is supported are push updates by sites. Subscribe to them, and you will get notifications on the desktop when the site updates.

Sometimes, these notifications may be annoying or unwanted, for instance, when you clicked allow instead of block when asked about them in your browser of choice. While it is possible to manage notifications in the browser, doing so is not as straightforward as it could be, as you have two main options to deal with them:
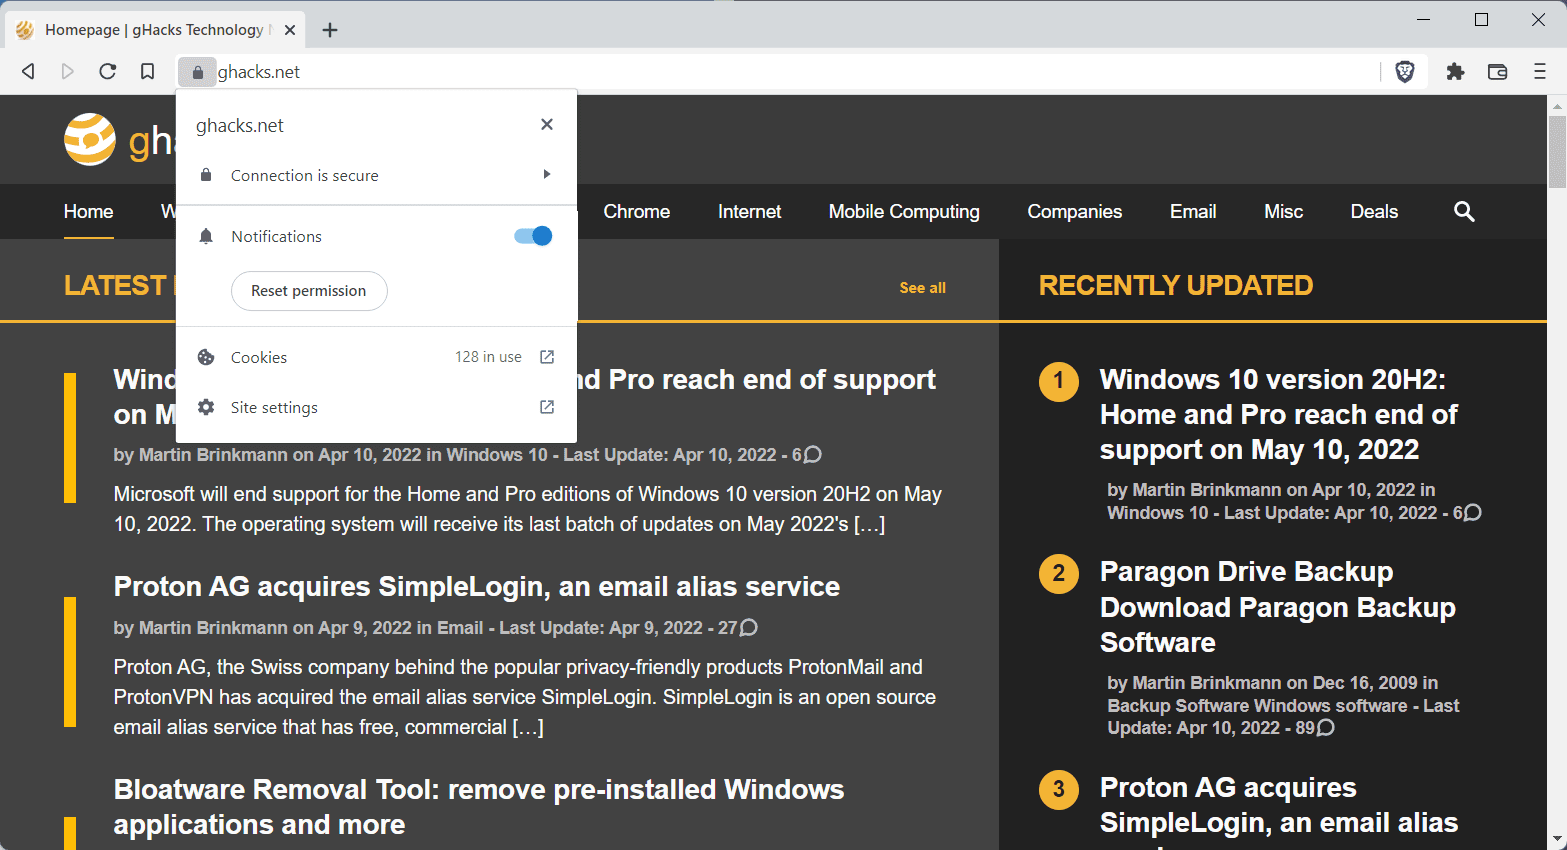
- Open the site in question and click on the icon to the left of the site address to change the notification status.
- Open the settings of the browser and navigate several levels to reach the site settings options. There you need to find the site in question and modify the preference.
 While that works, it is not as straightforward, especially if a user happens to allow notifications regularly. Experienced computer users may avoid these, but if you work in IT support, you may have encountered devices with notifications allowed for a lot of sites. Many sites display prompts to users automatically to get them to allow notifications, and many users click on allow to get rid of the prompt.
Again, there is a browser setting supported by most web browsers to turn off notifications entirely. All Chromium-based browsers have these in the Site Settings, and in most, loading chrome://settings/content/notifications opens the right configuration screen. Just switch the setting to “don’t allow” and you are done.
Firefox-compatible users load about:preferences#privacy in the browser’s address bar, scroll down to Permissions, select the Settings button next to Notifications, and check the “block new requests asking for notifications” to deal with it in the browser.
Windows 11 notifications

Web browsers are not the only types of apps that may send notifications. Calendar and mail applications, games, and any type of app may use the system.
Windows 11 users who don’t want to receive any notifications can turn them off completely in the operating system. This speeds up the process significantly.
Here is how that is done:
- Select Start and then Settings.
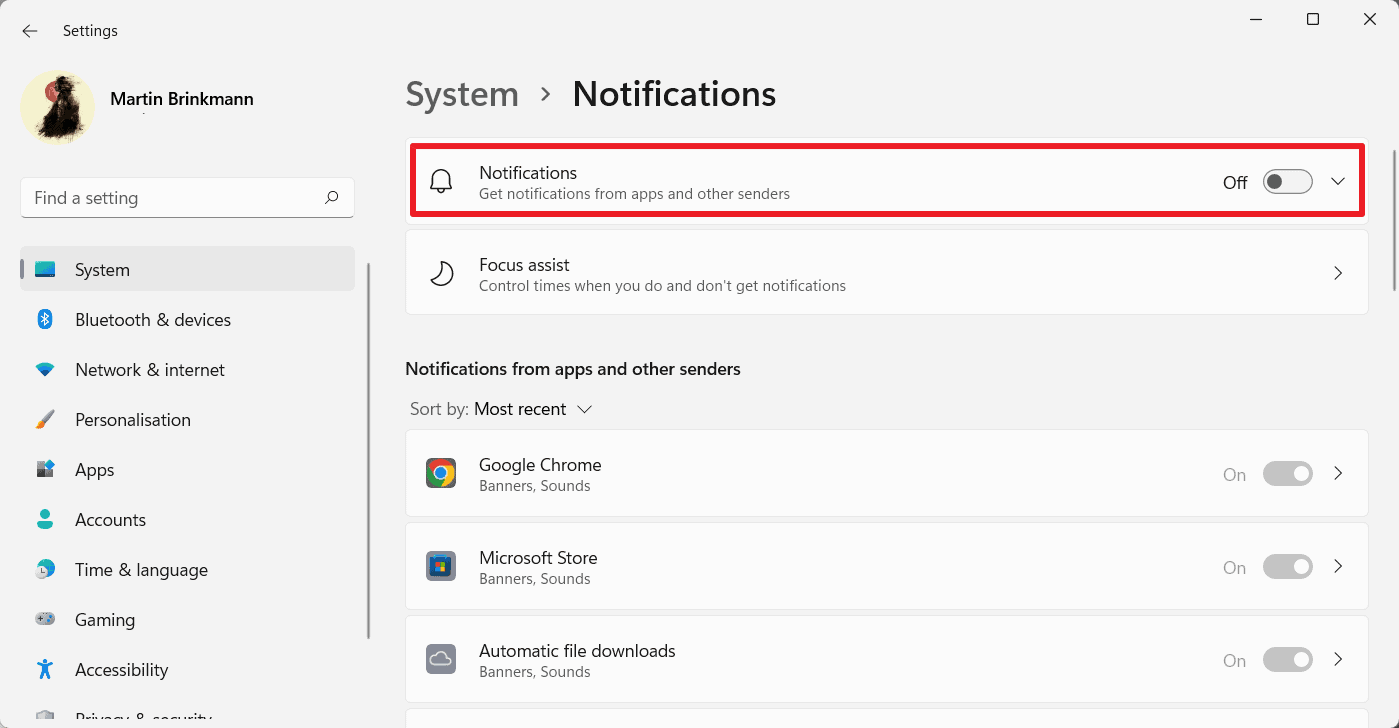
- Open System and there the Notifications section.
- To turn off all Notifications, toggle the main Notifications setting at the top of the page that opens.

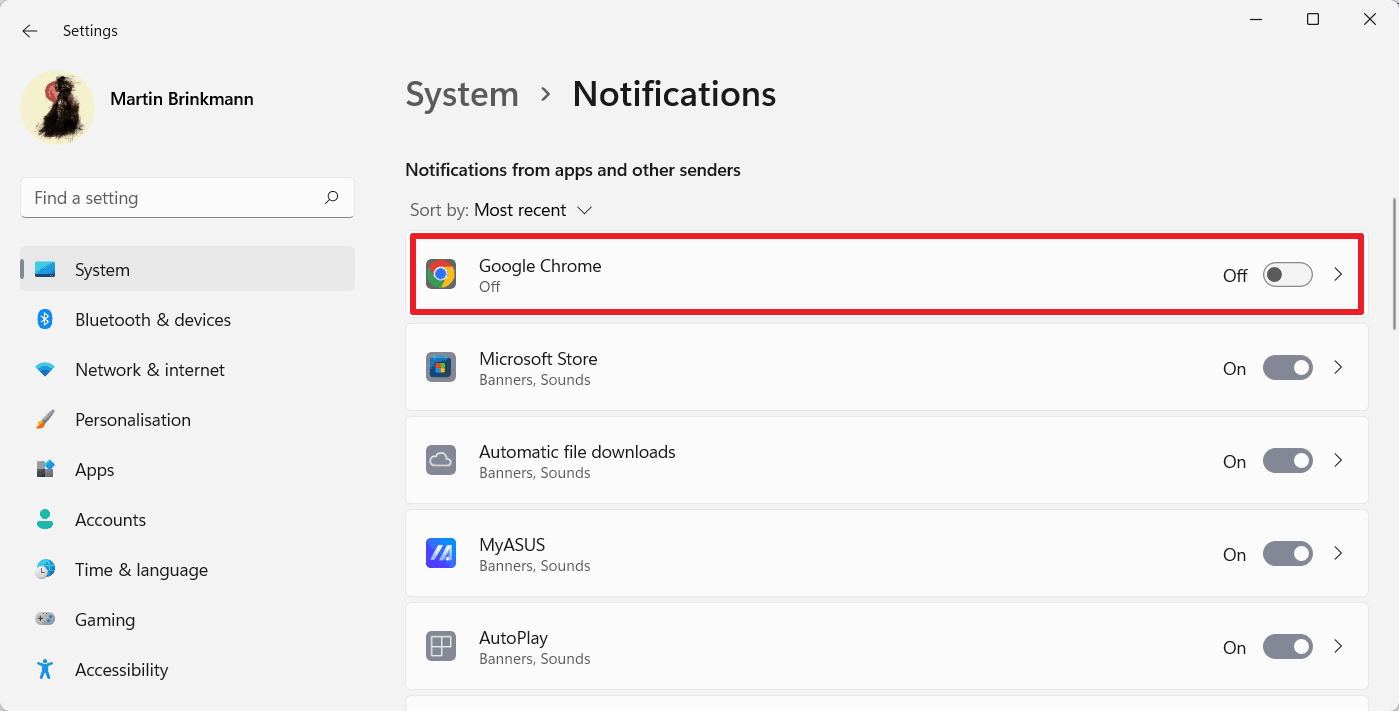
You may also disable notifications for specific applications. Keep the main Notifications setting turned on for that. Scroll down to the application listing and locate the program that you want to modify. The listing is sorted by recency, but you may change that to an alphabetical listing if you prefer it. There is no find option on the page.
Use the main On/Off toggle to set the notifications permission to off for selected applications.

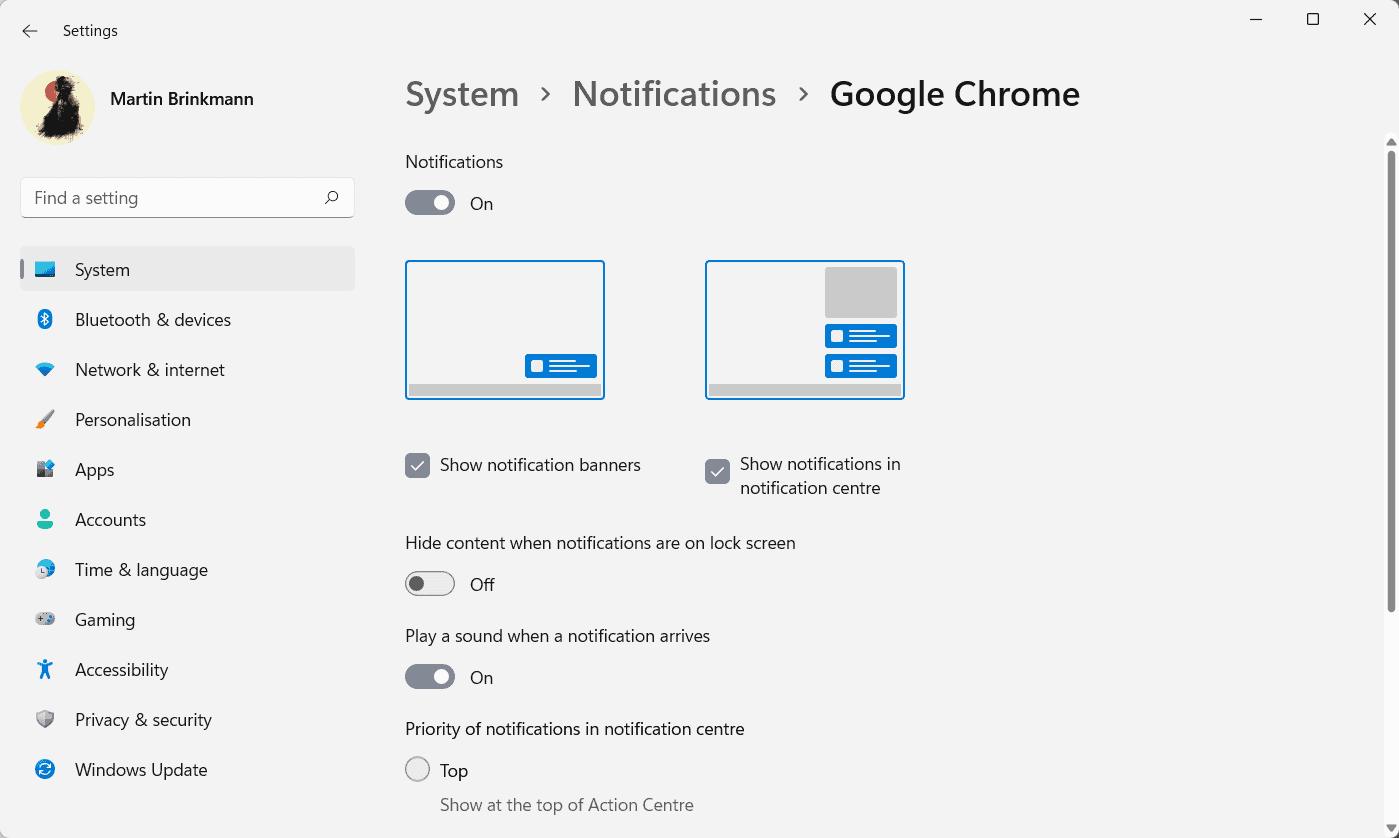
The “>” button opens additional customization options:
- Define how notifications are displayed (on the desktop as banners AND/OR in the Notification Center).
- Enable or disable playing a sound when notifications arrive.
- Set a display priority for notifications from the app in the Notification Center.
You could modify the preferences for the app so that notifications are only displayed in the Notifications Center and not on the desktop.
You may undo any change easily with another click on the toggle or the checkbox.
Now You: do you make use of notifications on your devices?
Thank you for being a Ghacks reader. The post How to block all notifications or notifications from specific apps in Windows 11 appeared first on gHacks Technology News.
