
FreeIPAは、Linux/Unixオペレーティングシステム向けの無料のオープンソースID管理ソリューションです。 これは、Linux/Unixシステムに認証および承認ソリューションを提供するRedHatID管理システムのアップストリームプロジェクトです。
FreeIPAは、Directory Server、DNS、Kerberos、PKI、Certmonger、NTP Server、Web管理UIなどの複数のコンポーネントの上に構築されています。これは、ユーザー資格情報とアクセス制御の集中ソースを提供します。 FreeIPAを使用すると、管理者は一元化された環境でIDを簡単に管理でき、ユーザーの監視、認証、およびアクセス制御も提供されます。
このガイドでは、RockyLinuxサーバーにFreeIPAIdentityManagerをインストールする方法を説明します。
前提条件
- LinuxサーバーRockLinux8.5。
- sudo管理者権限を持つroot以外のユーザー。
FQDNの設定
最初に、Rocky LinuxサーバーのFQDN(完全修飾ドメイン名)と/ etc/hostsファイルを設定します。
サーバーのFQDNを設定するには、以下のコマンドを実行します。 この例では、FQDNを使用しています ipa.hwdomain.io。
sudo hostnamectl set-hostname ipa.hwdomain.io
ファイルを編集します / etc / hosts nanoエディターを使用します。
sudo nano /etc/hosts
サーバーのIPアドレスとFQDNの詳細を以下のように入力します。
192.168.10.25 ipa.hwdomain.io ipa
を押してファイルを保存します Ctrl + x と入力 Y ファイルを確認して保存します。
次に、次のコマンドを実行して、RockyLinuxサーバーのFQDNを確認します。
hostname -f
ipa.hwdomain.ioなどのサーバーFQDNの出力を取得する必要があります。
最後に、以下のpingコマンドを実行して、FQDNが正しいサーバーIPアドレスに解決されていることを確認します。
ping -c3 ipa.hwdomain.io
以下のスクリーンショットでは、FQDN ipa.hwdomain.io 解決され、IPアドレスで到達可能 192.168.10.25。
次のステップに進み、FreeIPAのインストールを開始します。
FreeIPAサーバーパッケージのインストール
FQDNおよび/etc/ hostsファイルの構成が完了している場合は、FreeIPAパッケージをRockyLinuxシステムにインストールします。
Rocky Linuxシステムでは、FreeIPAに関連するすべてのパッケージがモジュールidm:DL1で利用できます。 FreeIPAパッケージをインストールできるようにするには、モジュールidm:DL1を有効にする必要があります。
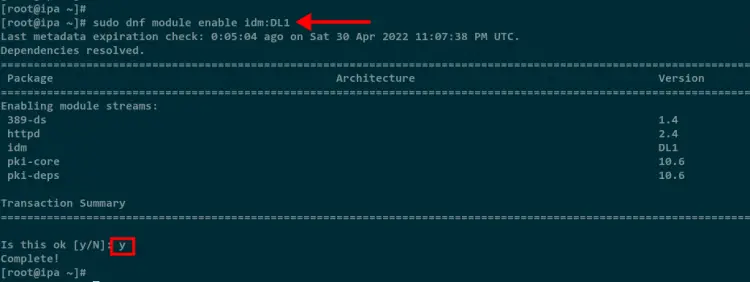
次のコマンドを実行して、Rocky Linuxシステムでidm:DL1モジュールを有効にします。
sudo dnf module enable idm:DL1
入力 Y モジュールを確認して有効にします。
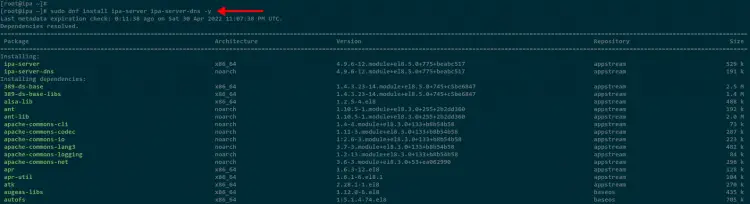
次に、以下のdnfコマンドを使用してFreeIPAパッケージをインストールします。 ザ ipa-server FreeIPAのメインパッケージであり、 ipa-server-dns DNSサーバー機能を提供するFreeIPAの追加パッケージです。
sudo dnf install ipa-server ipa-server-dns -y
すべてのパッケージのインストールを待ちます。サーバーの接続によっては時間がかかります。
すべてのインストールが完了したら、次の手順に進んでFreeIPAサーバーの構成を開始します。
FreeIPAサーバーの構成
次に、RockyLinuxシステムにFreeIPAサーバーをセットアップします。
FreeIPAサーバーを構成する前に、サーバーのIPv6が有効化およびアクティブ化されていることを確認してください。 カーネルスペースでIPv6が有効になっているが、ネットワークスタックでは使用できない場合、FreeIPAサーバーはエラーを自動的に検出します。
サーバーのIPアドレスをチェックして、IPv6がネットワークインターフェイスで使用可能であることを確認します。
sudo ip a
以下のスクリーンショットでは、出力にinet6が表示されています。これは、IPv6がローカルネットワークインターフェイスで利用可能であり、FreeIPAサーバーをセットアップする準備ができていることを意味します。

次に、以下のipa-server-installコマンドを実行して、FreeIPAサーバーの構成を開始します。
sudo ipa-server-install --setup-dns --allow-zone-overlap
最初に、FreeIPAサーバーをセットアップするために何をするかについての基本的な情報が表示されます。
The log file for this installation can be found in /var/log/ipaserver-install.log
==============================================================================
This program will set up the IPA Server.
Version 4.9.6This includes:
  * Configure a stand-alone CA (dogtag) for certificate management
  * Configure the NTP client (chronyd)
  * Create and configure an instance of Directory Server
  * Create and configure a Kerberos Key Distribution Center (KDC)
  * Configure Apache (httpd)
  * Configure DNS (bind)
  * Configure SID generation
  * Configure the KDC to enable PKINIT
FreeIPAサーバーは、サーバーFQDNを自動的に検出し、それをデフォルトのサーバーホスト名として使用します。 プレス 入力 確認して続行します。
To accept the default shown in brackets, press the Enter key.Enter the fully qualified domain name of the computer
on which you're setting up server software. Using the form
<hostname>.<domainname>
Example: master.example.com.Server host name [ipa.hwdomain.io]:
次に、FreeIPAサーバーのドメイン名を設定する必要があります。 これは、サーバーのFQDNに基づいて自動的に検出されます。 この例では、サーバーのFQDNはipa.hwdomain.ioであるため、ドメイン名はhwdomain.ioである必要があります。
プレス 入力 確認して続行します。
Warning: skipping DNS resolution of host ipa.hwdomain.io
The domain name has been determined based on the host name.Please confirm the domain name [hwdomain.io]:
次に、Kerberos認証用にREALMドメイン名を設定する必要があります。 ほとんどの場合、FreeIPAドメイン名と同じですが、大文字になっています。
The kerberos protocol requires a Realm name to be defined.
This is typically the domain name converted to uppercase.Please provide a realm name [HWDOMAIN.IO]:
ディレクトリサーバーの新しいパスワードを入力します。 パスワードは8文字以上である必要があるため、ディレクトリマネージャには必ず強力なパスワードを使用してください。
Certain directory server operations require an administrative user.
This user is referred to as the Directory Manager and has full access
to the Directory for system management tasks and will be added to the
instance of directory server created for IPA.
The password must be at least 8 characters long.Directory Manager password:
Password (confirm):
次に、IPA管理者ユーザーの別のパスワードを入力します。 このユーザーは、FreeIPAサーバーへのログイン、または管理者ユーザーとしてのKerberosに対する認証に使用されます。 IPA管理者ユーザーには必ず強力なパスワードを使用してください。
The IPA server requires an administrative user, named 'admin'.
This user is a regular system account used for IPA server administration.IPA admin password:
Password (confirm):
次のステップでは、DNSフォワーダーを設定するように求められます。 プレス 入力 続行すると、FreeIPAは現在の電流を自動的に検出します /etc/resolv.conf DNSフォワーダーとしてファイル。
Checking DNS domain hwdomain.io., please wait ...
Do you want to configure DNS forwarders? [yes]: yes
Following DNS servers are configured in /etc/resolv.conf: 192.168.121.1
Do you want to configure these servers as DNS forwarders? [yes]:
ここで、FreeIPAサーバーのIPアドレスの逆引きゾーンを作成するように求められます。 プレス 入力 続行すると、FreeIPAはサーバーIPアドレスの新しい逆引きゾーンを自動的に作成します。
Do you want to search for missing reverse zones? [yes]:
Do you want to create reverse zone for IP 192.168.10.25 [yes]:
Please specify the reverse zone name [10.168.192.in-addr.arpa.]:
Using reverse zone(s) 10.168.192.in-addr.arpa.
Trust is configured but no NetBIOS domain name found, setting it now.
Enter the NetBIOS name for the IPA domain.
Only up to 15 uppercase ASCII letters, digits and dashes are allowed.
Example: EXAMPLE.NetBIOS domain name [HWDOMAIN]:
NTP構成の場合は、デフォルトのままにして、を押します。 入力 にとって いいえ。
Do you want to configure chrony with NTP server or pool address? [no]:
ここで、FreeIPAサーバーのインストールと構成を確認するように求められます。 FreeIPAサーバーの構成の詳細を再度確認してから、入力してください はい を押して 入力 インストールと構成を確認します。
The IPA Master Server will be configured with:
Hostname:       ipa.hwdomain.io
IP address(es): 192.168.10.25
Domain name:    hwdomain.io
Realm name:     HWDOMAIN.IOThe CA will be configured with:
Subject DN:   CN=Certificate Authority,O=HWDOMAIN.IO
Subject base: O=HWDOMAIN.IO
Chaining:     self-signedBIND DNS server will be configured to serve IPA domain with:
Forwarders:       192.168.121.1
Forward policy:   only
Reverse zone(s):  10.168.192.in-addr.arpa.Continue to configure the system with these values? [no]: yes
これで、FreeIPAのインストールと構成が開始されます。
The following operations may take some minutes to complete.
Please wait until the prompt is returned.Disabled p11-kit-proxy
Synchronizing time
No SRV records of NTP servers found and no NTP server or pool address was provided.
Using default chrony configuration.
Attempting to sync time with chronyc.
Time synchronization was successful.
Configuring directory server (dirsrv). Estimated time: 30 seconds
  [1/41]: creating directory server instance
  [2/41]: tune ldbm plugin
  [3/41]: adding default schema
  [4/41]: enabling memberof plugin
FreeIPAのインストールと構成が完了すると、次の出力メッセージが表示されます。
以下の出力メッセージでは、FreeIPAサーバーのファイアウォールを設定するための次のステップについても通知されます。 FreeIPAサーバー用にいくつかのポートを開き、Kerberosサーバーに対してadminユーザーを使用して認証を確認する必要があります。
==============================================================================
Setup completeNext steps:
1. You must make sure these network ports are open:
TCP Ports:
* 80, 443: HTTP/HTTPS
* 389, 636: LDAP/LDAPS
* 88, 464: kerberos
* 53: bind
UDP Ports:
* 88, 464: kerberos
* 53: bind
* 123: ntp2. You can now obtain a Kerberos ticket using the command: 'kinit admin'
This ticket will allow you to use the IPA tools (e.g., ipa user-add)
and the web user interface.Be sure to back up the CA certificates stored in /root/cacert.p12
These files are required to create replicas. The password for these
files is the Directory Manager password
The ipa-server-install command was successful
これで、FreeIPAサーバーのインストールと構成が完了しました。
Firewalldの設定
このステップでは、Firewalldルールにいくつかのサービスを追加します。 これには、LDAP、DNS、HTTPSなどのFreeIPAサーバーの基本サービスが含まれます。
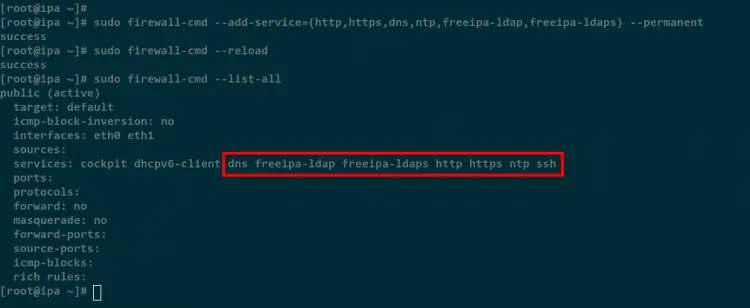
以下のfirewall-cmdコマンドを実行して、FreeIPAサーバーの一部のサービスをFirewalldに追加します。
sudo firewall-cmd --add-service={http,https,dns,ntp,freeipa-ldap,freeipa-ldaps} --permanent
その後、以下のコマンドを使用してFirewalldルールをリロードします。
sudo firewall-cmd --reload
最後に、以下のコマンドを使用して、Firewalldのルールのリストを確認します。
sudo firewall-cmd --list-all
以下のスクリーンショットでは、FreeIPAサーバーのすべてのサービスがFirewalldに追加されています。
Kerberos管理者認証の確認
Firewalldを設定した後、FreeIPAサーバー上のKerberosに対する認証を確認します。
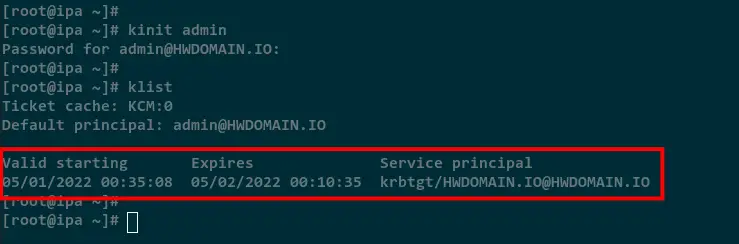
以下のコマンドを実行して、adminユーザーを使用してKerberosサーバーに対して認証します。
kinit admin
これで、IPAサーバーのパスワードの入力を求められます。 正しいパスワードを入力してください。
認証に成功したら、以下のコマンドを実行して、サーバー上のKerberosチケットのリストを確認します。
klist
以下のスクリーンショットでは、ユーザーadminの新しいKerberosチケットが使用可能であり、Kerberosサーバーに対する認証が成功しています。
FreeIPAダッシュボードにログインする
このステップでは、FreeIPA Web管理ダッシュボードにログインして、FreeIPAのインストールを確認します。
Webブラウザーを開き、以下のようにサーバーのIPアドレスまたはFQDNにアクセスします。 これで、FreeIPAログインページが表示されます。
https://ipa.hwdomain.io/ipa/ui/
FreeIPA管理者ユーザーとパスワードを入力し、[ログイン]ボタンをクリックします。
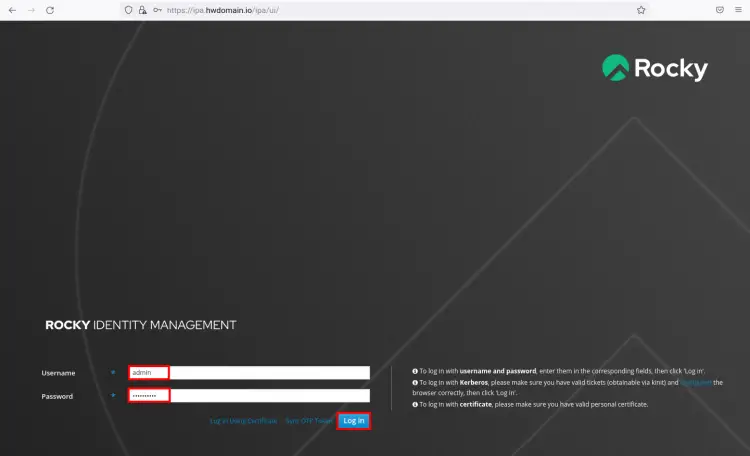
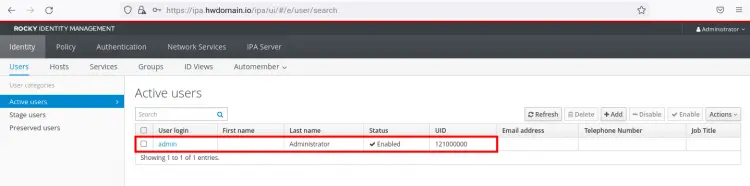
ログインすると、以下のFreeIPA管理ダッシュボードが表示されます。
結論
おめでとうございます! これで、RockyLinuxにFreeIPAが正常にインストールおよび構成されました。 また、IPA管理者ユーザーを使用してKerberosサーバーに対して正常に認証され、FreeIPAサーバーにログインしました。
The post RockyLinuxにFreeIPAをインストールする方法 appeared first on Gamingsym Japan.