When you sign in to Windows 10, the user account name is displayed on the screen. Perhaps you want to change it for some reason. This is easy to do and there are several ways to do it. Let’s talk about them in more detail.
BY TOPIC: How to automatically organize files in Windows: an overview of the best applications.
How to change username in Windows 10
There can be many reasons for changing the username in Windows 10, some are trying to make their account less playful or get rid of the facelessness in the face of a certain “user”. If you decide to change the user account name in Windows 10 that is displayed on the screen when you log in, then this can be done in several different ways. In this article, we will share the top 3 options to quickly change your username in Windows 10.
BY TOPIC: How to Fix Windows 10 Errors and Speed Up: Best Programs (Free).
Using netplwiz to change username in Windows 10
The netplwiz account settings utility helps you change usernames in Windows 10 instantly. Let’s find out how to do it.
1. In the search box on the taskbar, type netplwiz and click Input. It is likely that you may need to select the desired user account from several available in the list.
2. In the window “Users of this computer» Select the account you want to change the name of.
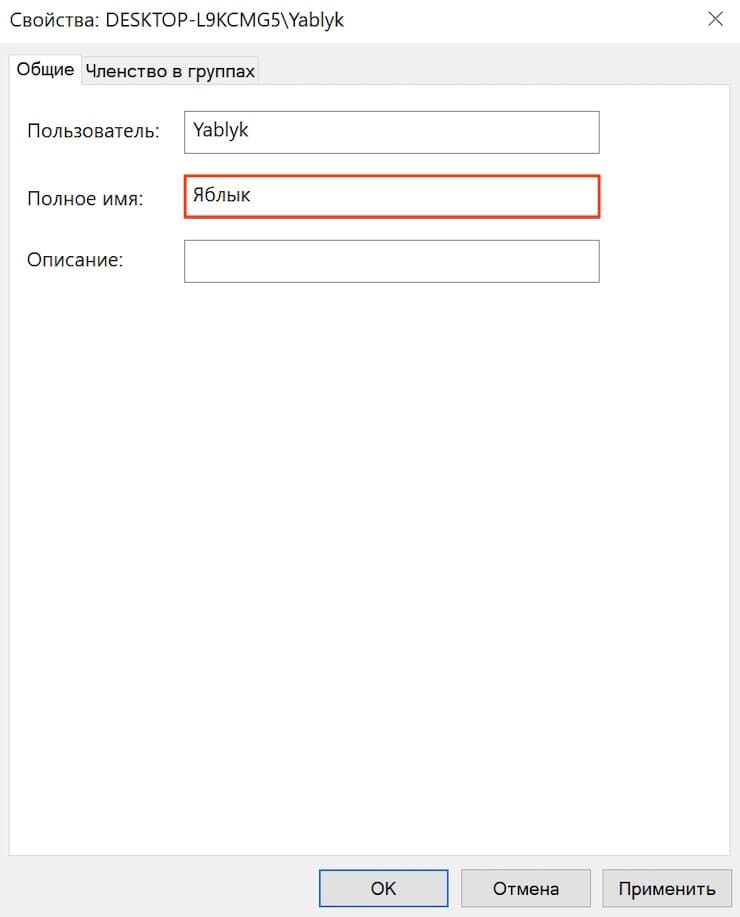
3. After you have done this, click on the button “Properties” located below the window.

4. In the window that appears, enter a new username in the “Full name“.

5. Now click “Apply” and OK to save changes.
You should now be able to see your new username when you sign in or out of your account.
BY TOPIC: How to create an invisible folder in Windows 10.
Working with the Local Users and Groups Console to Change a User Name in Windows
Here is another quick way to change your username in Windows. To do this, you need to run the lusrmgr.msc command. Follow these steps:
1. Right click the start menu and select “Run“. Also, you can press the keys Win+Rto open the “Run“.
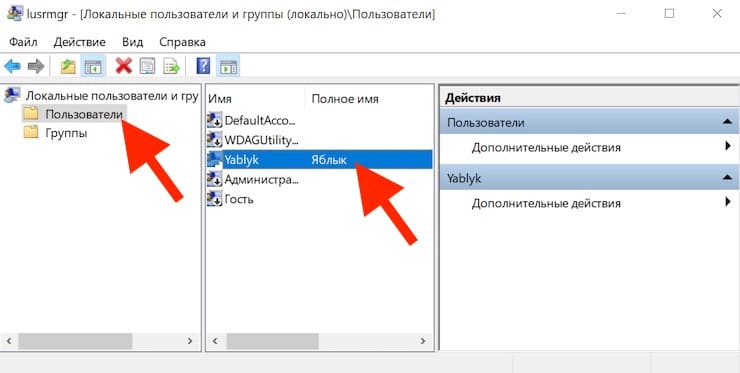
2. When the “Run“, enter the command lusrmgr.msc in it and click”Input“. Now you can work in the window “Local Users and Groups ».

3. Here you will find folders “Users” and “Groups“. Expand the folder “Users‘ on the left panel.
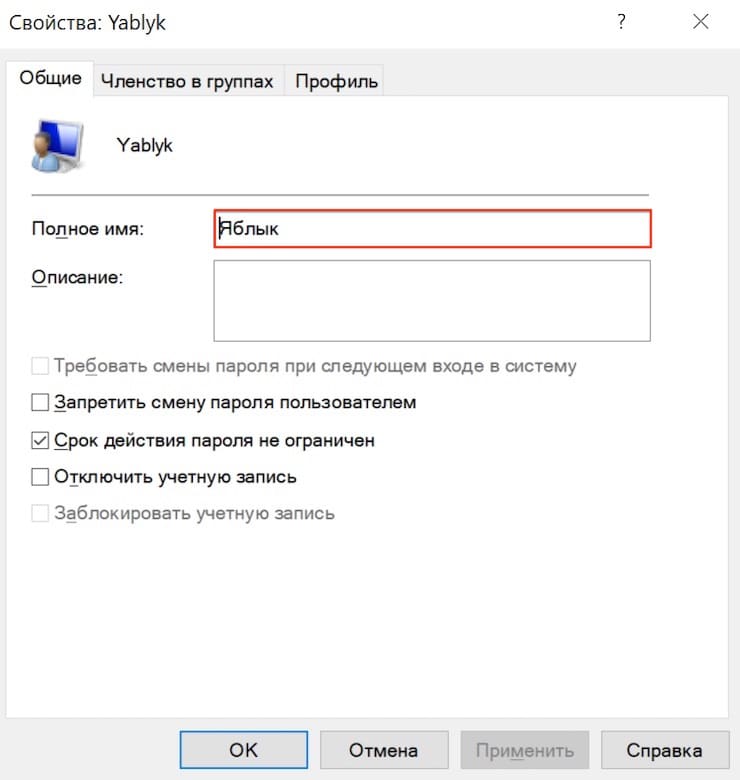
4. Here you can see several user accounts on your system. Double click on the user account you want to rename.

5. Enter a new username when prompted. This name must be entered in the “Full name“.

6. Click “Apply” and OK to save changes.
You can also use this setting to prevent a user from changing their password. To do this, check the box “Prevent user from changing password”, press “Apply” and OK.
BY TOPIC: How to automatically switch the language (layout) on the keyboard in macOS or Windows.
Using the “Control Panel” to change the username in Windows
The last way to change the username in Windows is using the “Control Panel”. To do this, follow these steps:
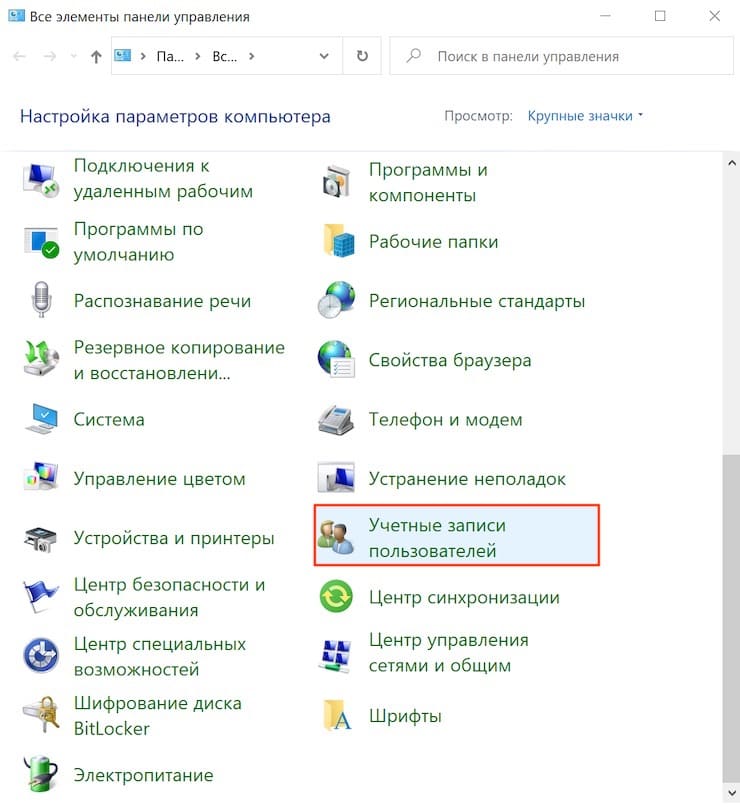
1. Press the keys Win+Rto open the launch window. After opening enter control panel and press Input. You can do it differently – use the search by entering the phrase control panel in the search box on the taskbar.

2. When you are in the “Control panels”, press “user accounts“.

3. In the next window, click “Change your account name”.

5. Now you need to enter a new account name.

6. Click “Rename» to save changes.
That’s all! You should now be able to see the new name on the window screen when logging in and logging out.
See also:
.
The post How to change username in Windows 10: 3 ways appeared first on Gamingsym.
