
このチュートリアルでは、Ubuntu22.04にSensuGoをインストールする方法を学びます。 センス はオープンソースのインフラストラクチャおよびアプリケーション監視ツールです。
Ubuntu22.04にSensuGoをインストールします
- 最小システムハードウェア要件
続行する前に、推奨システムを確認してください ハードウェア要件。
違いがある 展開アーキテクチャ センスゴーのために。 このガイドでは、スタンドアロン展開を使用します。
- SensuGoをUbuntu22.04にインストールします。
Sensu Goは、Sensuバックエンドがサーバーとして機能し、Sensuエージェントがクライアントとして機能するクライアントサーバーアーキテクチャで動作します。
Sensuコンポーネントリファレンスページによると、
Sensu Backendは、チェックリクエストと可観測性データを管理するサービスです。 すべてのSensuバックエンドには、サブスクリプションを使用してチェックをスケジュールするための統合構造、イベントフィルター、ミューテーター、ハンドラーを適用するイベント処理パイプライン、構成と状態を保存するための組み込みetcdデータストア、Sensu API、Sensu Web UI、およびsensuctlコマンドラインが含まれます。道具。
Sensuエージェントは、監視するインフラストラクチャコンポーネントで実行される軽量クライアントです。 エージェントは、Sensuバックエンドに監視エンティティとして登録します。 type: "agent"。 エージェントエンティティは、バックエンドイベントパイプラインに送信するチェックイベントとメトリックイベントを作成する責任があります。
Ubuntu22.04にSensuGoバックエンドをインストールします
SensuはAPTリポジトリから簡単にインストールできます。 ただし、この記事の執筆時点では、Ubuntu22.04用に作成されたSensuリポジトリはまだありません。
したがって、Ubuntu22.04でSensuGoを実行する必要がある場合は、Ubuntu 20.04 FocalSensuAPTリポジトリの使用を検討してください。
wget https://packagecloud.io/install/repositories/sensu/stable/script.deb.shos=ubuntu dist=focal bash ./script.deb.shSensuGoバックエンドをインストールします。
sudo apt updatesudo apt install sensu-go-backendSensuGoコマンドラインツールをインストールします。
以下のコマンドを実行して、SensuGoリソースの制御に役立つSensuGoコマンドラインツールをインストールします。
sudo apt install sensu-go-clisensu-go-cliがインストールするバイナリは sensuctl。
Ubuntu22.04でSensuGoバックエンドを構成して起動する
Sensuを起動してフォアグラウンドで実行することも、サービスとして実行することもできます。
フォアグラウンドで実行するには、以下のコマンドを実行するだけです。
sudo -u sensu sensu-backend startプレス Ctrl+c 止まる。
コマンドsensu-backendの使用法については、ヘルプページから学ぶことができます。
sensu-backend --helpSensuをサービスとして実行するには、以下のコマンドを実行してサンプル構成をダウンロードします。
curl -sL https://docs.sensu.io/sensu-go/latest/files/backend.yml -o /etc/sensu/backend.ymlサンプル構成は非常にコメントされています。
cat /etc/sensu/backend.yml--- # Sensu backend configuration ## # backend configuration ## #labels: # example_key: "example value" #annotations: # example/key: "example value" #assets-burst-limit: 100 #assets-rate-limit: 1.39 #agent-rate-limit: 100 #cache-dir: "/var/cache/sensu/sensu-backend" #config-file: "/etc/sensu/backend.yml" #debug: false #deregistration-handler: "example_handler" log-level: "debug" #available log levels: panic, fatal, error, warn, info, debug, trace #state-dir: "/var/lib/sensu/sensu-backend" #require-fips: false #require-openssl: false #eventd-buffer-size: 100 #eventd-workers: 100 #keepalived-buffer-size: 100 #keepalived-workers: 100 #pipelined-buffer-size: 100 #pipelined-workers: 100 ## # api configuration ## #api-listen-address: "[::]:8080" #listen on all IPv4 and IPv6 addresses #api-request-limit: 512000 #api-url: "http://localhost:8080" ## # tls configuration ## #agent-auth-cert-file: /path/to/tls/backend-1.pem #agent-auth-crl-urls: http://localhost/CARoot.crl #agent-auth-key-file: /path/to/tls/backend-1-key.pem #agent-auth-trusted-ca-file: /path/to/tls/ca.pem #agent-burst-limit: null #agent-host: "[::]" #listen on all IPv4 and IPv6 addresses #agent-port: 8081 #agent-rate-limit: null #cert-file: "/path/to/tls/backend-1.pem" #insecure-skip-tls-verify: false #jwt-private-key-file: /path/to/key/private.pem #jwt-public-key-file: /path/to/key/public.pem #key-file: "/path/to/tls/backend-1-key.pem" #trusted-ca-file: "/path/to/tls/ca.pem" #dashboard-cert-file: "/path/to/tls/separate-webui-cert.pem" #dashboard-host: "[::]" #dashboard-key-file: "/path/to/tls/separate-webui-key.pem" #dashboard-port: 3000 ## # etcd datastore configuration ## #etcd-advertise-client-urls: # - http://localhost:2378 # - http://localhost:2379 #etcd-cert-file: "/path/to/tls/backend-1.pem" #etcd-cipher-suites: # - TLS_ECDHE_ECDSA_WITH_AES_256_GCM_SHA384 # - TLS_ECDHE_RSA_WITH_AES_256_GCM_SHA384 # - TLS_ECDHE_ECDSA_WITH_AES_128_GCM_SHA256 # - TLS_ECDHE_RSA_WITH_AES_128_GCM_SHA256 # - TLS_ECDHE_ECDSA_WITH_CHACHA20_POLY1305 # - TLS_ECDHE_RSA_WITH_CHACHA20_POLY1305 #etcd-client-cert-auth: false #etcd-client-urls: # - https://10.0.0.1:2379 # - https://10.1.0.1:2379 #etcd-discovery: # - https://discovery.etcd.io/3e86b59982e49066c5d813af1c2e2579cbf573de #etcd-discovery-srv: # - example.org #etcd-initial-advertise-peer-urls: # - https://10.0.0.1:2380 # - https://10.1.0.1:2380 #etcd-initial-cluster: "backend-0=https://10.0.0.1:2380,backend-1=https://10.1.0.1:2380,backend-2=https://10.2.0.1:2380" #etcd-initial-cluster-state: "new" #etcd-initial-cluster-token: "unique_token_for_this_cluster" #etcd-key-file: "/path/to/tls/backend-1-key.pem" #etcd-listen-client-urls: # - https://10.0.0.1:2379 # - https://10.1.0.1:2379 #etcd-listen-peer-urls: # - https://10.0.0.1:2380 # - https://10.1.0.1:2380 #etcd-name: "backend-0" #etcd-peer-cert-file: "/path/to/tls/backend-1.pem" #etcd-peer-client-cert-auth: false #etcd-peer-key-file: "/path/to/tls/backend-1-key.pem" #etcd-peer-trusted-ca-file: "./ca.pem" #etcd-trusted-ca-file: "./ca.pem" #no-embed-etcd: false #etcd-election-timeout: 3000 #etcd-heartbeat-interval: 300 #etcd-max-request-bytes: 1572864 #etcd-quota-backend-bytes: 4294967296
次に、Sensu Goバックエンドを起動して有効にし、デフォルトの構成設定でシステムブートで実行できるようにします。
sudo systemctl enable --now sensu-backendSensuGoバックエンドコマンドのステータスを確認します。
systemctl status sensu-backendサンプル出力;
● sensu-backend.service - The Sensu Backend service.
     Loaded: loaded (/lib/systemd/system/sensu-backend.service; enabled; vendor preset: enabled)
     Active: active (running) since Fri 2022-05-06 20:56:19 UTC; 25s ago
   Main PID: 10317 (sensu-backend)
      Tasks: 9 (limit: 2241)
     Memory: 29.2M
        CPU: 872ms
     CGroup: /system.slice/sensu-backend.service
             └─10317 /usr/sbin/sensu-backend start -c /etc/sensu/backend.yml

May 06 20:56:43 jellyfish sensu-backend[10317]: {"component":"etcd","level":"debug","caller":"v3rpc/interceptor.go:182","msg":"request stats","start time":"2022-05-06T20:5>
May 06 20:56:43 jellyfish sensu-backend[10317]: {"component":"etcd","level":"debug","caller":"v3rpc/lease.go:118","msg":"failed to receive lease keepalive request from gRP>
May 06 20:56:43 jellyfish sensu-backend[10317]: {"cache_version":"v1","component":"cache","level":"debug","msg":"rebuilding the cache for resource type *v2.Silenced","time>
May 06 20:56:43 jellyfish sensu-backend[10317]: {"component":"etcd","level":"debug","caller":"v3rpc/interceptor.go:182","msg":"request stats","start time":"2022-05-06T20:5>
May 06 20:56:43 jellyfish sensu-backend[10317]: {"cache_version":"v2","component":"cache","level":"debug","msg":"rebuilding the cache for resource type *v3.EntityConfig",">
May 06 20:56:43 jellyfish sensu-backend[10317]: {"component":"etcd","level":"debug","caller":"v3rpc/interceptor.go:182","msg":"request stats","start time":"2022-05-06T20:5>
May 06 20:56:43 jellyfish sensu-backend[10317]: {"cache_version":"v1","component":"cache","level":"debug","msg":"rebuilding the cache for resource type *v2.Namespace","tim>
May 06 20:56:43 jellyfish sensu-backend[10317]: {"component":"etcd","level":"debug","caller":"v3rpc/interceptor.go:182","msg":"request stats","start time":"2022-05-06T20:5>
May 06 20:56:44 jellyfish sensu-backend[10317]: {"cache_version":"v2","component":"cache","level":"debug","msg":"rebuilding the cache for resource type *v3.EntityConfig",">
May 06 20:56:44 jellyfish sensu-backend[10317]: {"component":"etcd","level":"debug","caller":"v3rpc/interceptor.go:182","msg":"request stats","start time":"2022-05-06T20:
クラスターのステータスを確認します。
curl -s http://127.0.0.1:8080/health | grep -oE '"Healthy":.*}]'出力に「Healthy":true その後、クラスターは正常です。
Sensu管理者アカウントを作成する
次に、Sensu初期化コマンドを実行します(sensu-backend init)以下で、Sensu管理者アカウントのユーザー名とパスワードを作成します。
の基本的な使用法 sensu-バックエンドの初期化 コマンドはヘルプ情報で確認できます。
sensu-backend init --helpinitialize a new sensu installation
Usage:
sensu-backend init [flags]
General Flags:
--cluster-admin-api-key string cluster admin API key
--cluster-admin-password string cluster admin password
--cluster-admin-username string cluster admin username
-c, --config-file string path to sensu-backend config file (default "/etc/sensu/backend.yml")
-h, --help help for init
--ignore-already-initialized exit 0 if the cluster has already been initialized
--interactive interactive mode
--timeout string duration to wait before a connection attempt to etcd is considered failed (must be >= 1s) (default "5s")
--wait continuously retry to establish a connection to etcd until it is successful
Store Flags:
--etcd-advertise-client-urls strings list of this member's client URLs to advertise to clients (default [http://localhost:2379])
--etcd-cert-file string path to the client server TLS cert file
--etcd-cipher-suites strings list of ciphers to use for etcd TLS configuration
--etcd-client-cert-auth enable client cert authentication
--etcd-client-log-level string etcd client logging level [panic, fatal, error, warn, info, debug] (default "error")
--etcd-client-urls string client URLs to use when operating as an etcd client
--etcd-key-file string path to the client server TLS key file
--etcd-max-request-bytes uint maximum etcd request size in bytes (use with caution) (default 1572864)
--etcd-trusted-ca-file string path to the client server TLS trusted CA cert file
したがって、Sensu管理者アカウントのユーザー名とパスワードを作成するには、次のオプションをに渡す必要があります。 sensu-backend init 指図。
--cluster-admin-username <username> --cluster-admin-password <password>ユーザー名とパスワードの両方にそれぞれ次の変数を使用することもできます。
SENSU_BACKEND_CLUSTER_ADMIN_USERNAME=<username>
SENSU_BACKEND_CLUSTER_ADMIN_PASSWORD=<password>
たとえば、変数を使用してアカウントを作成するには、最初にbash履歴を無効にします。
set +o historyユーザー名/パスワード変数を設定します。
export SENSU_BACKEND_CLUSTER_ADMIN_USERNAME=sensuadmin
export SENSU_BACKEND_CLUSTER_ADMIN_PASSWORD=password
Sensuインスタンスを初期化します
sensu-backend initサンプル出力;
{"component":"cmd","level":"info","msg":"attempting to connect to etcd server: http://localhost:2379","time":"2022-05-06T21:05:46Z"}
{"component":"backend.seeds","level":"info","msg":"seeding etcd store with initial data","time":"2022-05-06T21:05:46Z"}
{"component":"store","level":"warning","msg":"migrating etcd database to a new version","time":"2022-05-06T21:05:48Z"}
{"component":"store","database_version":1,"level":"info","msg":"successfully upgraded database","time":"2022-05-06T21:05:48Z"}
{"component":"store","database_version":2,"level":"info","msg":"successfully upgraded database","time":"2022-05-06T21:05:49Z"}
{"component":"store","level":"warning","msg":"migrating enterprise etcd database to a new version","time":"2022-05-06T21:05:49Z"}
{"component":"store","database_version":1,"level":"info","msg":"successfully upgraded database","time":"2022-05-06T21:05:49Z"}
{"component":"store","database_version":2,"level":"info","msg":"successfully upgraded database","time":"2022-05-06T21:05:49Z"}
bash履歴を有効にします。
set -o historyいつでもユーザーの資格情報を確認したり、ユーザーのパスワードをリセットしたりできます。 sensuctl 指図。
Sensu CLIコマンドを使用する前に、sensuctl構成を初期化する必要があります
sensuctl configureそれに応じてプロンプトを確認します。
サンプル出力;
? Authentication method: username/password
? Sensu Backend API URL: http://127.0.0.1:8080
? Namespace: default
? Preferred output format: tabular
? Username: sensuadmin
? Password: ********
非対話型モードでコマンドを実行することもできます。
sensuctl configure -n
--username 'YOUR_USERNAME'
--password 'YOUR_PASSWORD'
--namespace default
--url 'http://127.0.0.1:8080'
管理者パスワードを変更します。
sensuctl user change-password --interactiveユーザーの忘れたパスワードをリセットします。
sensuctl user reset-password USERNAME --interactiveSensu GoWebUIへのアクセス
Sensu GoWebUIサービスはリッスンします ポート デフォルトでは3000/tcp。
sudo ss -altnp | grep sensuLISTEN 0 4096 127.0.0.1:2379 0.0.0.0:* users:(("sensu-backend",pid=3462,fd=8))
LISTEN 0 4096 127.0.0.1:2380 0.0.0.0:* users:(("sensu-backend",pid=3462,fd=7))
LISTEN 0 4096 *:8080 *:* users:(("sensu-backend",pid=3462,fd=18))
LISTEN 0 4096 *:8081 *:* users:(("sensu-backend",pid=3462,fd=19))
LISTEN 0 4096 *:3000 *:* users:(("sensu-backend",pid=3462,fd=20))
ファイアウォールが実行されている場合は、このポートを開いて外部アクセスを許可します。
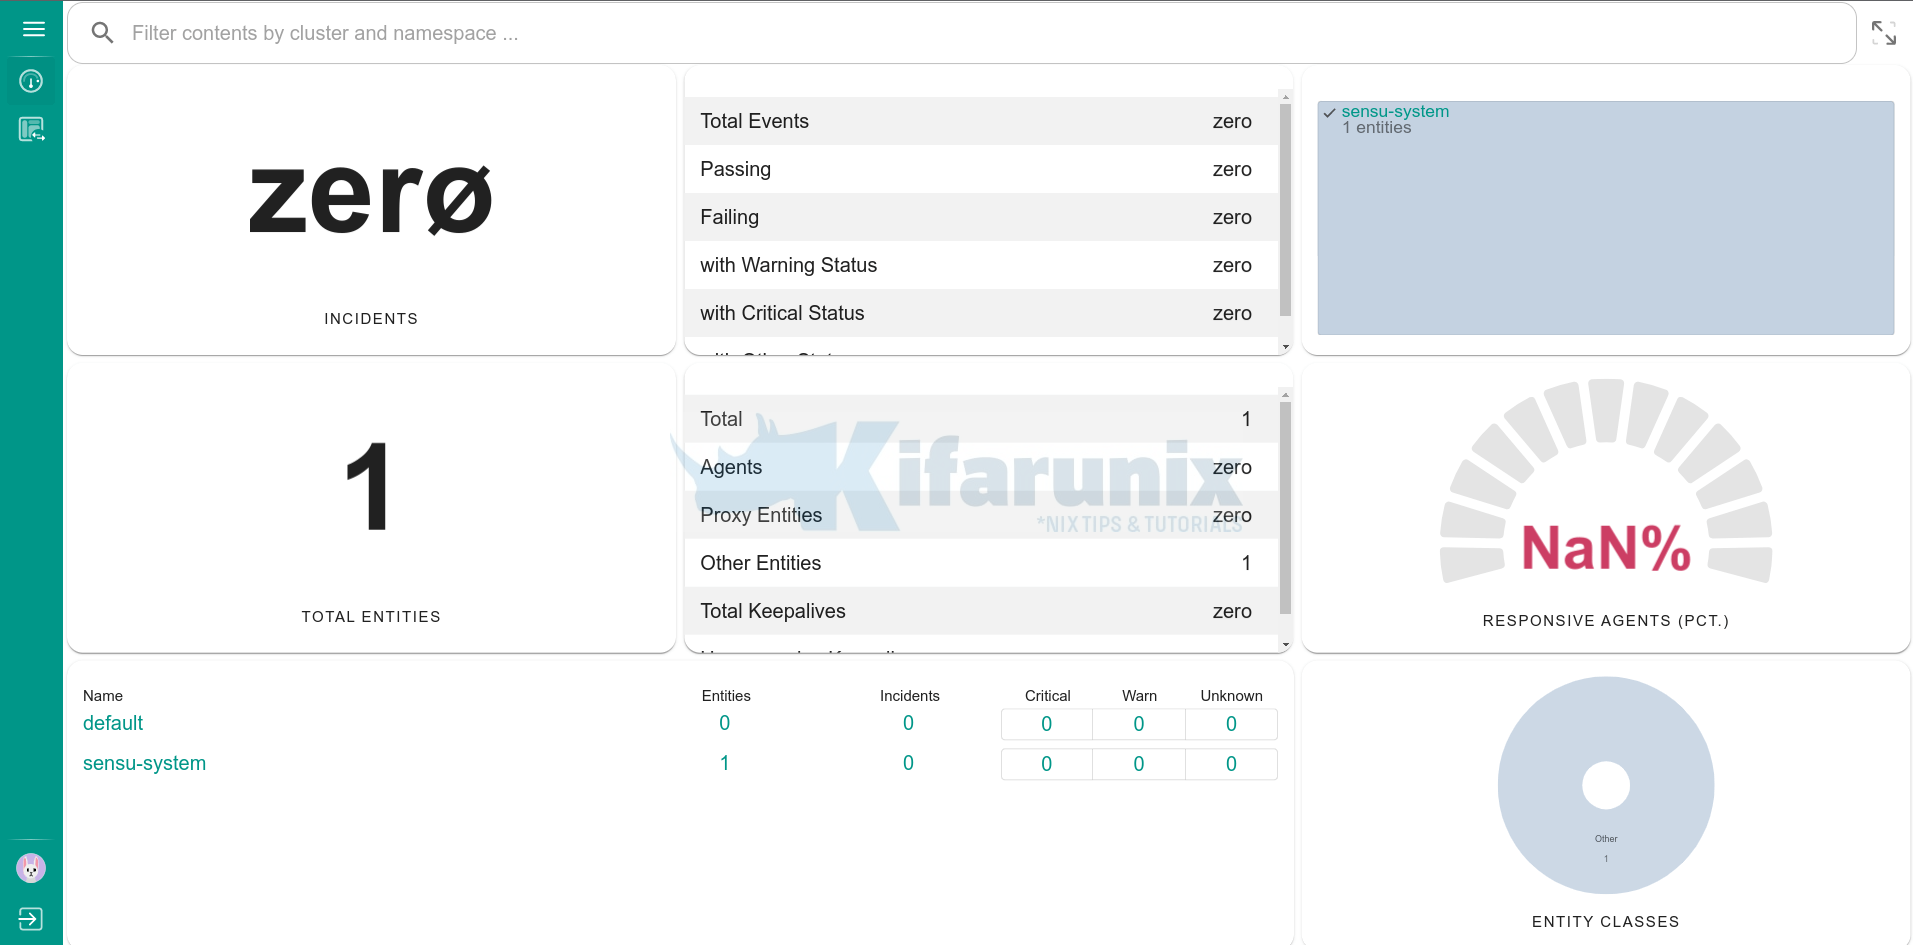
sudo ufw allow 3000/tcpアドレスを使用してSensuGoWebUIにアクセスする http://server-address-or-IP:3000。
上記で作成した資格情報を使用してログインします。
センスダッシュボード
これが、Ubuntu22.04にSensuGoを簡単にインストールする方法です。
次のガイドでは、Sensuエージェントをインストールし、エンドポイントの監視を開始する方法を学習します。
参照
その他のチュートリアル
WazuhおよびELKスタックを使用してWindowsシステムでプロセス作成イベントを監視する
ELKStack8.xをUbuntuにインストールします
The post Ubuntu22.04にSensuGoをインストールします appeared first on Gamingsym Japan.