The fight against malware is an ongoing battle as technology becomes more powerful. To protect your computer, it is advisable to use all available tools.
Many users are unaware of the built-in malware scanner in the Google Chrome browser for Windows. It is activated periodically to clean up spam in the browser, but you can run a scan at any time to make sure your system is secure.
BY TOPIC: Virus check online, or how to check a computer without installing the usual antivirus.
How to Enable Antivirus in Google Chrome (Only works on Windows)
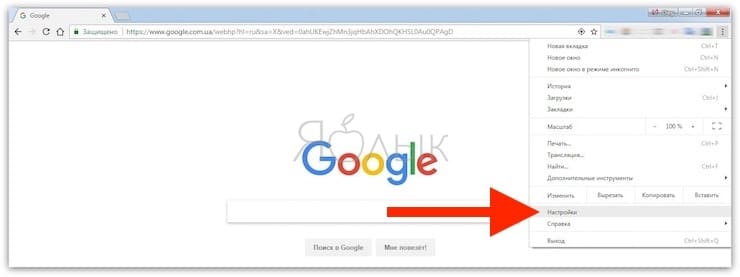
1. Click on the button with three dots in the upper right corner of the Chrome window and select “Settings”.
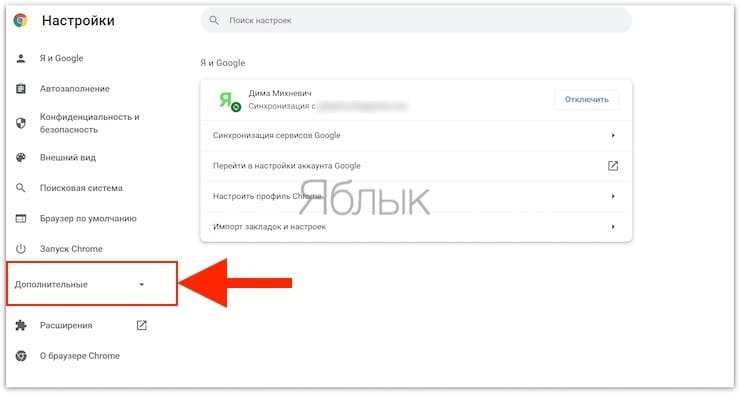
2. Click “Additional” in the left column.
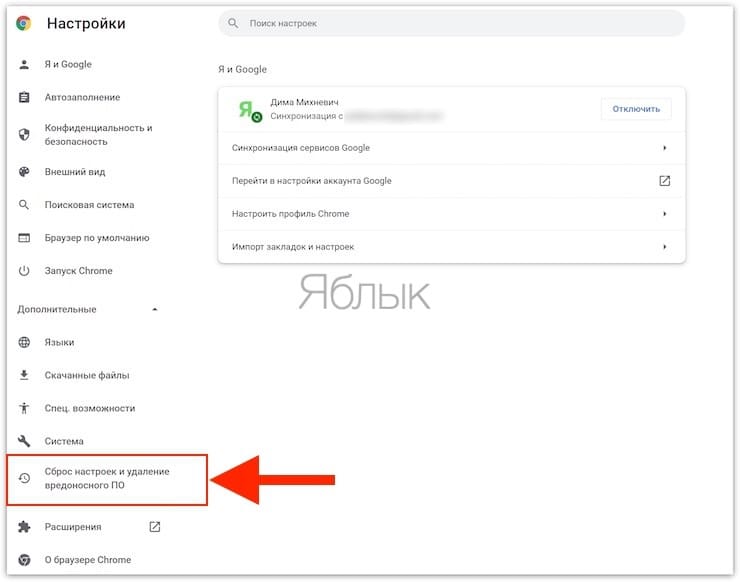
3. Select an item “Reset and Remove Malware” in the list that appears. Click “Remove malware from computer”.
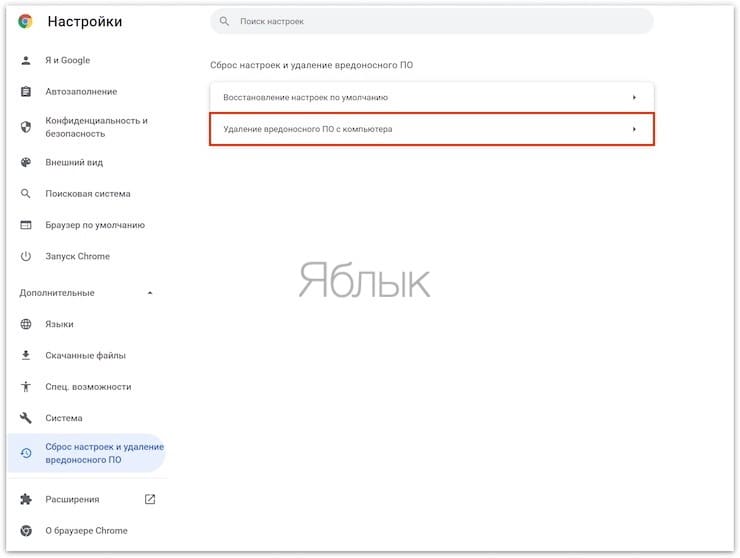
4. The function of searching and removing malicious software will become available to you. Start scanning.
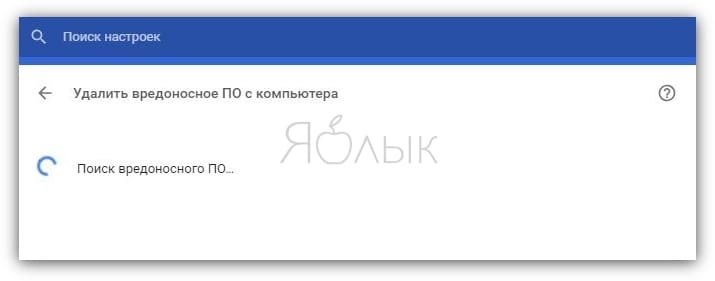
5. When finished, Chrome will notify the user that there is malware on the computer. If they are still there, they can be removed.
6. You can quickly get to this menu by entering chrome://settings/cleanup into the address bar.
If you don’t see this option, make sure Chrome is up to date by visiting “Menu” → “Reference” → “About Google Chrome”.
Please note that this is not a generic malware scanner. It only checks for malware related to Chrome. Thus, it is better to leave the installed antivirus.
This tool helps to get rid of malware for the browser, it is worth running it when you see a lot of pop-ups, unknown pages in the search or virus warnings.
See also:
.
The post How to enable the built-in antivirus in Google Chrome and check your computer for viruses appeared first on Gamingsym.
