
このチュートリアルに従って、RockyLinuxにLibreNMSをインストールする方法を学びます。 LibreNMS は、フル機能のMySQL/PHPおよびSNMPベースのネットワーク監視システムです。
RockyLinuxにLibreNMSをインストールする
Rocky LinuxにLibreNMSをインストールするには、次の手順に従います。
- LibreNMSシステムのユーザーアカウントを作成する
まず、以下のコマンドを実行して、LibreNMSの非特権システムユーザーアカウントを作成します。
sudo useradd -d /opt/librenms -M -r -s /bin/bash librenmssudo dnf install epel-release- 必要なパッケージをインストールする
LibreNMSにはLが必要です[E/A]MPスタック。 したがって、以下のコマンドを実行して、Webサーバー、Nginx、PHP、MariaDB、およびその他の必要なパッケージをインストールします。 Nginxは、使用することをお勧めするWebサーバーです。
サポートされているPHPの最小バージョンは7.3です。。 このチュートリアルではPHP7.4を使用します。
RockyLinuxにPHP7.4をインストールできるようにするには、次のようにPHP7.4のリポジトリモジュールを有効にします。
sudo dnf module reset phpsudo dnf module enable php:7.4sudo dnf install bash-completion cronie fping git httpd ImageMagick
mariadb-server mtr net-snmp net-snmp-utils nmap php-fpm php-cli
php-common php-curl php-gd php-json php-mbstring php-process
php-snmp php-xml php-zip php-mysqlnd python3 python3-PyMySQL
python3-devel python3-redis python3-memcached python3-pip
python3-systemd rrdtool unzip policycoreutils-python-utils- LibreNMSのデータベースとデータベースユーザーを作成する
MariaDBサーバーを起動して有効にし、システムの起動時に実行できるようにします。
systemctl enable --now mariadbステータスを確認します。
systemctl status mariadb● mariadb.service - MariaDB 10.3 database server
Loaded: loaded (/usr/lib/systemd/system/mariadb.service; enabled; vendor preset: disabled)
Active: active (running) since Tue 2022-05-31 13:23:16 EDT; 9s ago
Docs: man:mysqld(8)
https://mariadb.com/kb/en/library/systemd/
Process: 38942 ExecStartPost=/usr/libexec/mysql-check-upgrade (code=exited, status=0/SUCCESS)
Process: 38872 ExecStartPre=/usr/libexec/mysql-prepare-db-dir mariadb.service (code=exited, status=0/SUCCESS)
Process: 38848 ExecStartPre=/usr/libexec/mysql-check-socket (code=exited, status=0/SUCCESS)
Main PID: 38911 (mysqld)
Status: "Taking your SQL requests now..."
Tasks: 30 (limit: 11256)
Memory: 64.3M
CGroup: /system.slice/mariadb.service
└─38911 /usr/libexec/mysqld --basedir=/usr
May 31 13:23:15 librenms.kifarunix-demo.com systemd[1]: mariadb.service: Succeeded.
May 31 13:23:15 librenms.kifarunix-demo.com systemd[1]: Stopped MariaDB 10.3 database server.
May 31 13:23:15 librenms.kifarunix-demo.com systemd[1]: Starting MariaDB 10.3 database server...
May 31 13:23:15 librenms.kifarunix-demo.com mysql-prepare-db-dir[38872]: Database MariaDB is probably initialized in /var/lib/mysql already, nothing is done.
May 31 13:23:15 librenms.kifarunix-demo.com mysql-prepare-db-dir[38872]: If this is not the case, make sure the /var/lib/mysql is empty before running mysql-prepare-db-dir.
May 31 13:23:15 librenms.kifarunix-demo.com mysqld[38911]: 2022-05-31 13:23:15 0 [Note] /usr/libexec/mysqld (mysqld 10.3.32-MariaDB) starting as process 38911 ...
May 31 13:23:16 librenms.kifarunix-demo.com systemd[1]: Started MariaDB 10.3 database server.
初期セキュリティスクリプトを実行して、テストテーブルを削除し、リモートルートログインを無効にし、テストテーブル/データベース/匿名ユーザーを削除します。
mysql_secure_installation次に、MariaDBデータベースにログインし、LibreNMSのデータベースとデータベースユーザーを作成します。 ここで使用されている名前は標準ではありません。 適切な名前を自由に使用してください。
mysql -u root -p -e "create database librenmsdb character set utf8mb4 collate utf8mb4_unicode_ci"mysql -u root -p -e "create user [email protected] identified by '[email protected]'"mysql -u root -p -e "grant all on librenmsdb.* to [email protected]"mysql -u root -p -e "flush privileges"InnoDBテーブルごとに1つのテーブルスペースファイルを使用するようにInnoDBを構成し、データベース名とテーブル名の大文字小文字を保持できるようにします。
sed -i.bak -e '/[mysqld]/a innodb_file_per_table=1nlower_case_table_names=0' /etc/my.cnf.d/mariadb-server.cnfMariaDBサービスを再起動します。
sudo systemctl restart mariadb- RockyLinuxにLibreNMSをインストールする
次に、Githubリポジトリをホームディレクトリに複製してLibreNMSをインストールします。 /opt/librenms、上記で定義された librenms ユーザー;
git clone https://github.com/librenms/librenms.git /opt/librenms- LibreNMSディレクトリおよびファイルの所有権、許可、およびアクセス制御リストを設定します。
chown -R librenms:librenms /opt/librenms
chmod 771 /opt/librenms
setfacl -d -m g::rwx /opt/librenms/rrd /opt/librenms/logs /opt/librenms/bootstrap/cache/ /opt/librenms/storage/setfacl -R -m g::rwx /opt/librenms/rrd /opt/librenms/logs /opt/librenms/bootstrap/cache/ /opt/librenms/storage/- LibreNMSPHPの依存関係をインストールします
ユーザーlibrenmsとして、必要なPHP依存関係をインストールします。
sudo -Hiu librenms /opt/librenms/scripts/composer_wrapper.php install --no-dev- データベース接続の資格情報を設定する
sudo -Hiu librenms vim /opt/librenms/.envDB_HOST=localhost
DB_DATABASE=librenmsdb
DB_USERNAME=librenmsuser
[email protected]- システムとPHPのタイムゾーンを更新します。
それに応じて、システムとPHPのタイムゾーンを更新してください。
timedatectl set-timezone America/Santiagosed -i.bak 's/;date.timezone =/date.timezone = America/Santiago/' /etc/php.iniデフォルトのSNMP構成ファイルをコピーします。
cp /opt/librenms/snmpd.conf.example /etc/snmp/snmpd.confSNMPDを編集し、コミュニティストリングを更新します。
vim /etc/snmp/snmpd.conf交換してください RANDOMSTRINGGOESHERE あなたの文字列で。
ファイルを保存して終了します
次に、システム配布検出スクリプトをダウンロードしてインストールします。
curl -o /usr/bin/distro https://raw.githubusercontent.com/librenms/librenms-agent/master/snmp/distroスクリプトを実行可能にします。
chmod +x /usr/bin/distroSNMPDサービスを開始して有効にします。
systemctl enable --now snmpd- LibreNMSCronジョブをインストールします
デフォルトのcronジョブを所定の場所にコピーします。
cp /opt/librenms/librenms.nonroot.cron /etc/cron.d/librenmsCronジョブのログローテーションを有効にします。
cp /opt/librenms/misc/librenms.logrotate /etc/logrotate.d/librenmsグローバルLibreNMSショートカットを作成します。
ln -s /opt/librenms/lnms /usr/local/bin/lnmsLibreNMSbash完了を有効にします。
cp /opt/librenms/misc/lnms-completion.bash /etc/bash_completion.d/LibreNMSデータベーススキーマをデータベースにインポートします。
su - librenms./lnms migrate- LibreNMSSELinuxポリシーを更新します。
exitsemanage fcontext -a -t httpd_sys_content_t '/opt/librenms/html(/.*)?'semanage fcontext -a -t httpd_sys_rw_content_t '/opt/librenms/(logs|rrd|storage)(/.*)?'restorecon -RFvv /opt/librenmssetsebool -P httpd_can_sendmail=1setsebool -P httpd_execmem 1chcon -t httpd_sys_rw_content_t /opt/librenms/.envsetsebool -P httpd_graceful_shutdown 1setsebool -P httpd_can_network_connect 1setsebool -P httpd_can_network_relay 1setsebool -P nis_enabled 1拒否されたリクエストがないか、常にログを確認してください。
tail -f /var/log/audit/audit.log | grep denied- LibreNMSNginxサイト構成ファイルを作成します
次に、以下のコマンドを実行してLibreNMSNginxサイト構成をインストールします。 それに応じて、PHP-FPMソケットパスを必ず置き換えてください。
cat > /etc/nginx/conf.d/librenms.conf << 'EOL'
server {
 listen      80;
 server_name librenms.kifarunix-demo.com;
 root        /opt/librenms/html;
 index       index.php;

 charset utf-8;
 gzip on;
 gzip_types text/css application/javascript text/javascript application/x-javascript image/svg+xml text/plain text/xsd text/xsl text/xml image/x-icon;
 location / {
  try_files $uri $uri/ /index.php?$query_string;
 }
 location ~ [^/].php(/|$) {
  fastcgi_pass unix:/run/php-fpm/www.sock;
  fastcgi_split_path_info ^(.+.php)(/.+)$;
  include fastcgi.conf;
  fastcgi_read_timeout 240;
 }
 location ~ /.(?!well-known).* {
  deny all;
 }
}
EOL
NginxWebユーザーをから変更します nginx に librenms ユーザー;
sed -i.bak 's/nginx;/librenms;/' /etc/nginx/nginx.confPHPFPMユーザーをから変更します www-data に librenms 上で作成したユーザー。
sed -i.bak 's/= apache/= librenms/g' /etc/php-fpm.d/www.conf- NginxおよびPHP-FPMサービスを再起動します
Nginxの構文を確認します。
nginx -tエラーがない場合のサンプル出力。
nginx: the configuration file /etc/nginx/nginx.conf syntax is ok
nginx: configuration file /etc/nginx/nginx.conf test is successful
サービスを再起動します。
systemctl restart nginx php-fpm起動時に実行できるようにします。
systemctl enable nginx php-fpmステータスを確認してください。
systemctl status nginx php-fpm● nginx.service - The nginx HTTP and reverse proxy server
Loaded: loaded (/usr/lib/systemd/system/nginx.service; disabled; vendor preset: disabled)
Drop-In: /usr/lib/systemd/system/nginx.service.d
└─php-fpm.conf
Active: active (running) since Tue 2022-05-31 14:20:29 -04; 6s ago
Process: 49866 ExecStart=/usr/sbin/nginx (code=exited, status=0/SUCCESS)
Process: 49860 ExecStartPre=/usr/sbin/nginx -t (code=exited, status=0/SUCCESS)
Process: 49857 ExecStartPre=/usr/bin/rm -f /run/nginx.pid (code=exited, status=0/SUCCESS)
Main PID: 49867 (nginx)
Tasks: 3 (limit: 11256)
Memory: 5.1M
CGroup: /system.slice/nginx.service
├─49867 nginx: master process /usr/sbin/nginx
├─49868 nginx: worker process
└─49869 nginx: worker process
May 31 14:20:29 librenms.kifarunix-demo.com systemd[1]: Starting The nginx HTTP and reverse proxy server...
May 31 14:20:29 librenms.kifarunix-demo.com nginx[49860]: nginx: the configuration file /etc/nginx/nginx.conf syntax is ok
May 31 14:20:29 librenms.kifarunix-demo.com nginx[49860]: nginx: configuration file /etc/nginx/nginx.conf test is successful
May 31 14:20:29 librenms.kifarunix-demo.com systemd[1]: Started The nginx HTTP and reverse proxy server.
● php-fpm.service - The PHP FastCGI Process Manager
Loaded: loaded (/usr/lib/systemd/system/php-fpm.service; disabled; vendor preset: disabled)
Active: active (running) since Tue 2022-05-31 14:20:29 -04; 5s ago
Main PID: 49863 (php-fpm)
Status: "Ready to handle connections"
Tasks: 6 (limit: 11256)
Memory: 17.2M
CGroup: /system.slice/php-fpm.service
├─49863 php-fpm: master process (/etc/php-fpm.conf)
├─49870 php-fpm: pool www
├─49871 php-fpm: pool www
├─49872 php-fpm: pool www
├─49873 php-fpm: pool www
└─49874 php-fpm: pool www
May 31 14:20:29 librenms.kifarunix-demo.com systemd[1]: php-fpm.service: Succeeded.
May 31 14:20:29 librenms.kifarunix-demo.com systemd[1]: Stopped The PHP FastCGI Process Manager.
May 31 14:20:29 librenms.kifarunix-demo.com systemd[1]: Starting The PHP FastCGI Process Manager...
May 31 14:20:29 librenms.kifarunix-demo.com systemd[1]: Started The PHP FastCGI Process Manager.
- WebブラウザへのLibreNMSのインストールを完了します
実行中の場合は、ファイアウォールでNginxWebサーバーを開きます。
firewall-cmd --add-port={80,443}/tcp --permanent
firewall-cmd --reload
次に、URLを使用してLibreNMSにアクセスします http:// server-name。
LibreNMSプレインストールチェック。
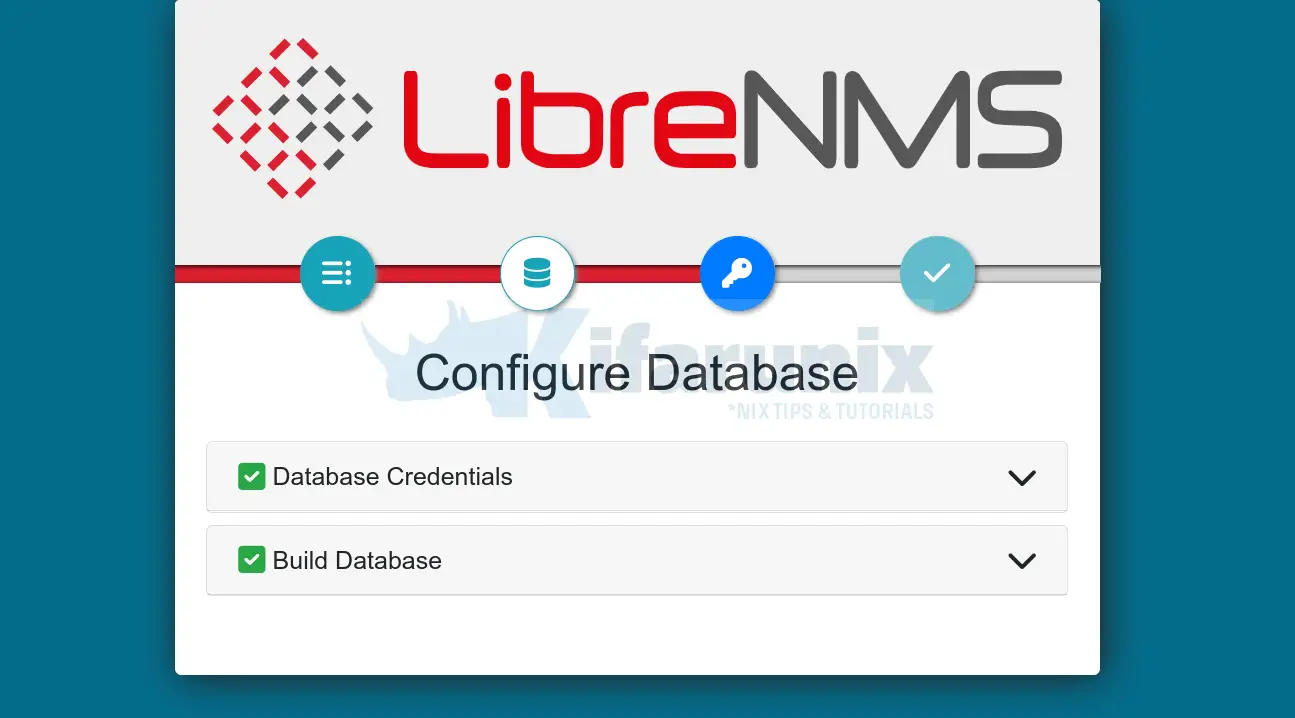
LibreNMSデータベース接続設定。 以前にクレデンシャルを提供したので、すべて問題ないはずです。
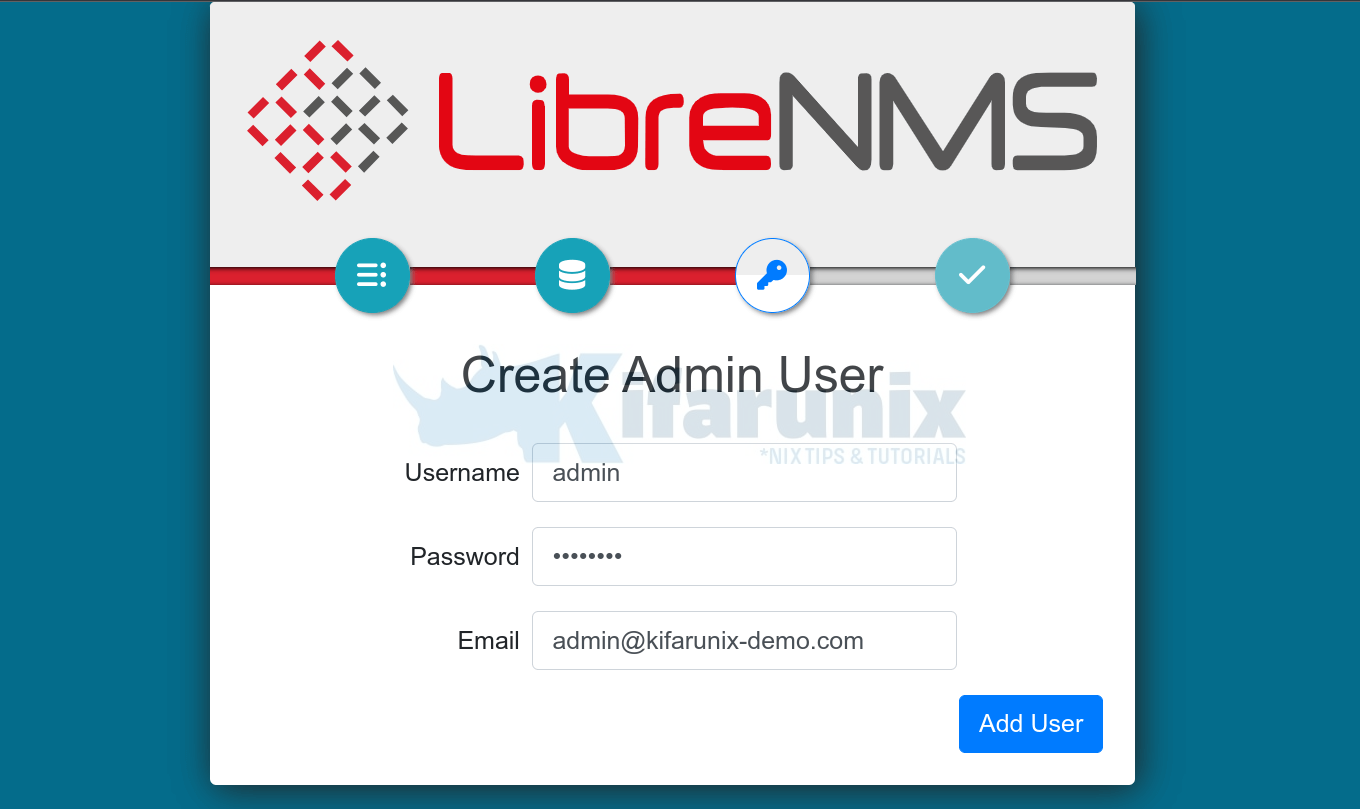
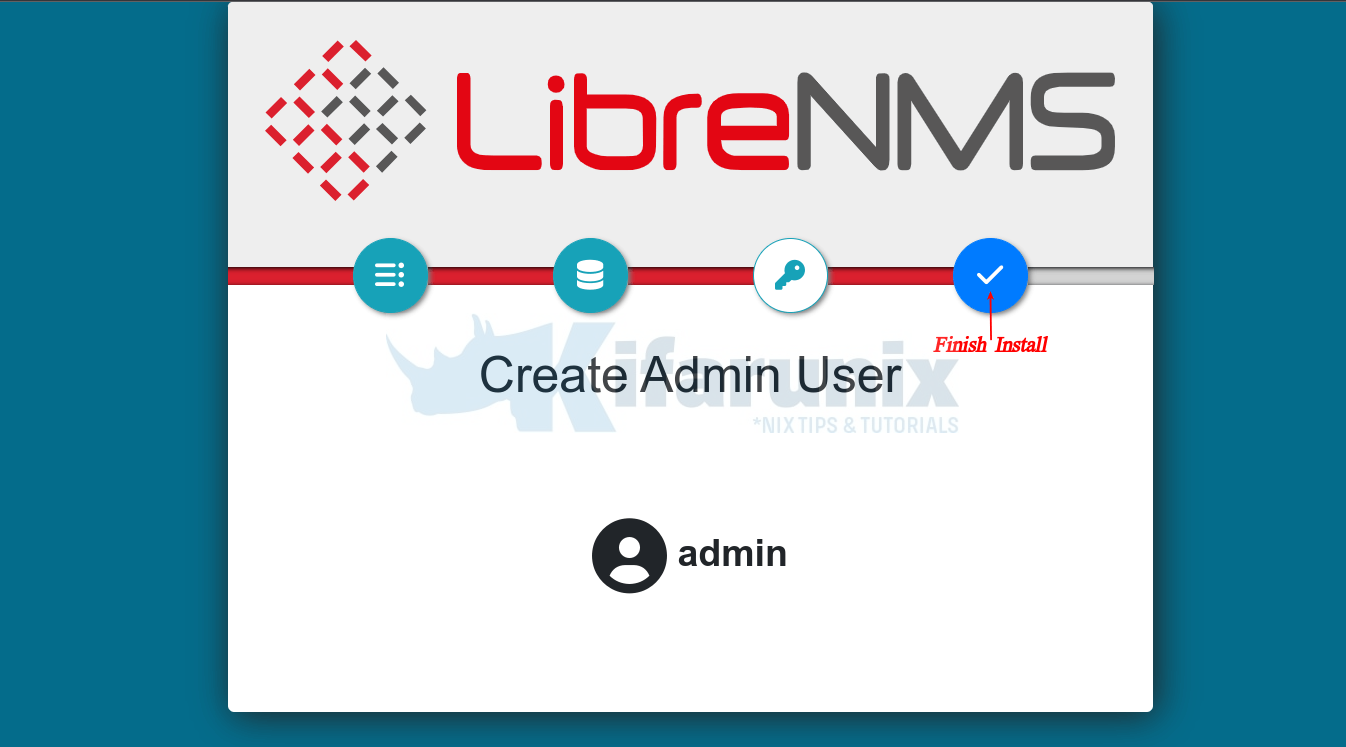
LibreNMS管理ユーザーを作成する
クリック インストールを終了します LibreNMSのセットアップを完了します。
クリックしてLibreNMSのインストールを検証します インストールを検証する リンク。
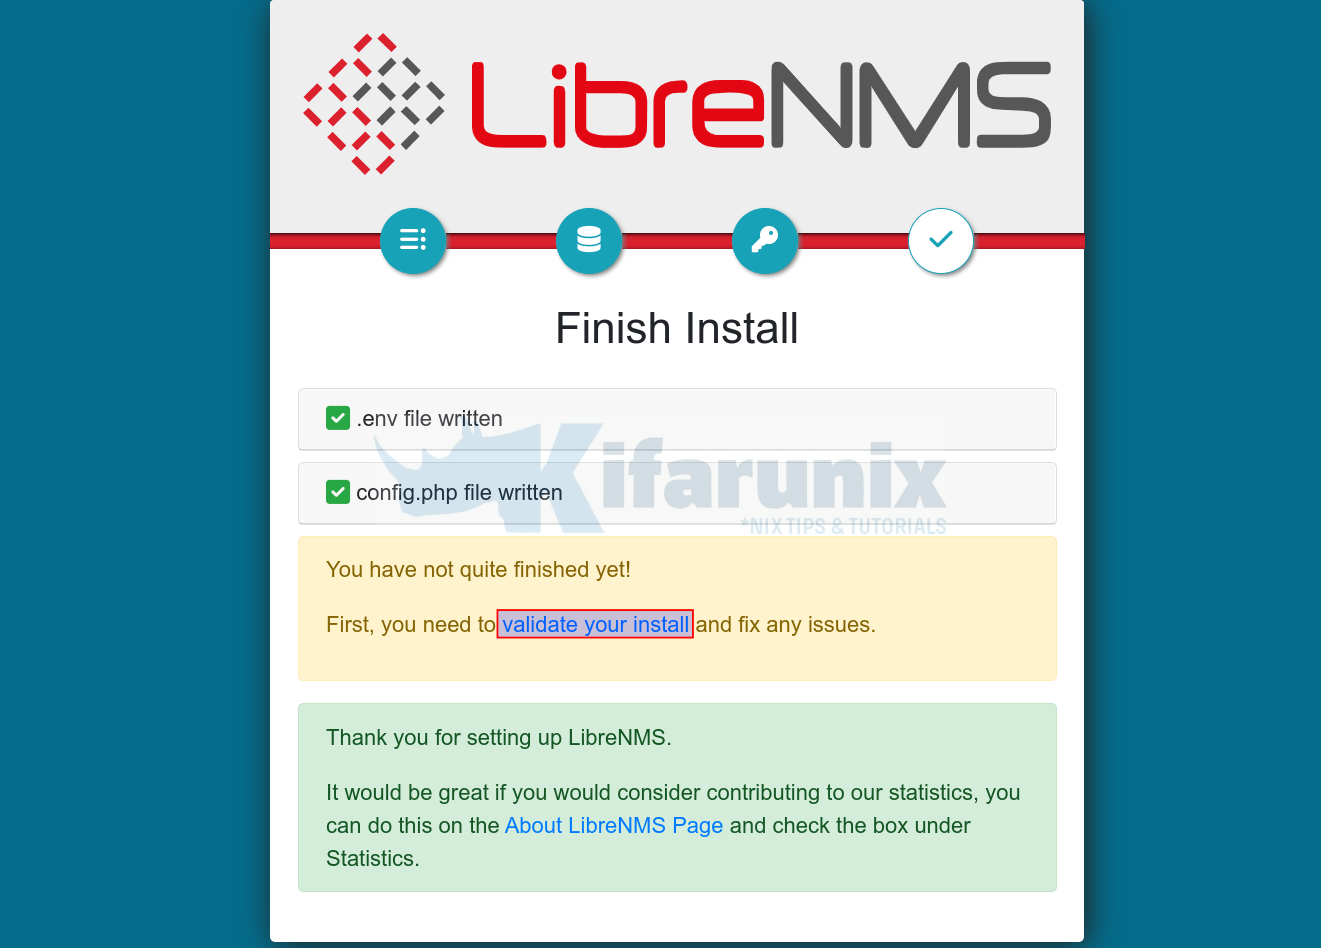
ログインページにリダイレクトされます。

その後、検証が続行され、結果がダッシュボードに表示されます。
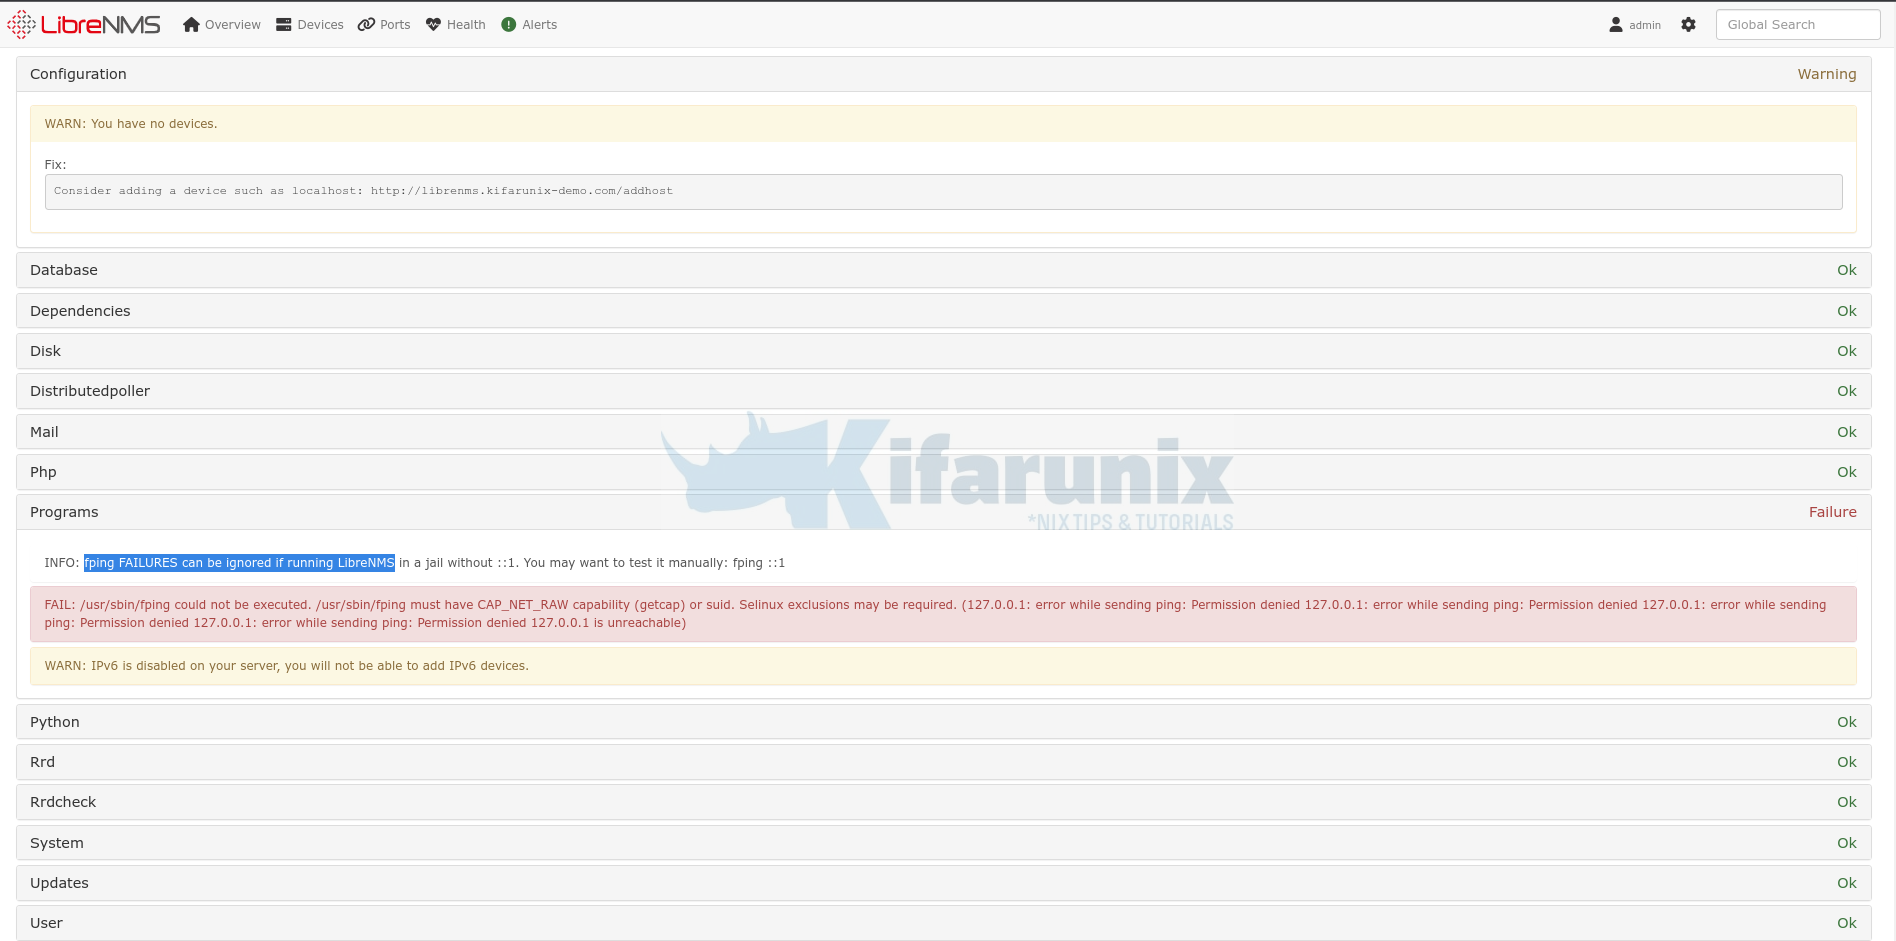
fpingでSELnuxの問題が発生した場合は、監査ログからポリシーを生成し、次のようにインストールできます。
grep denied /var/log/audit/audit.log | grep fping | audit2allow -a -M fpingsemodule -i fping.ppそれ以外の場合、IPv6デバイスの使用を計画していない場合は、fpingFAILURESを無視できます。
ホストがLibreNMSにまだ追加されていないという警告が表示される場合があります。
これで、RockyLinuxにLibreNMSをインストールする方法に関するチュートリアルは終了です。 次のLibreNMSチュートリアルのために接続を維持します。
それまでの間、 ドキュメントページ。
その他のチュートリアル
Ubuntu 22.04 /Ubuntu20.04にLibreNMSをインストールします
Ubuntu20.04にCactiを簡単にインストールしてセットアップする
The post RockyLinuxにLibreNMSをインストールする appeared first on Gamingsym Japan.